Designing for 3D printing requires you to keep in mind that your object will be a physical object with weight, size, and constraints. Even if your object is coherent and seems to be at the dimensions you wish on the screen, it is vital to check if the 3D printed object will match your expectations and the machine constraints. Here are some tips to help you manage the units and size for 3D Printing with Sculpteo.
How to Choose a Unit of Measure for your CAD File
Whether you use the metric system or not, you need to know your model’s exact size and dimension.
Quite frequently, when you create a new file or scene in your CAD software, you are asked what unit of measure you want to use for this modeling project.
If not, you can modify it in the software settings. We wrote tutorials for the most used CAD software that you can discover here.
On Sculpteo, the default measure unit set is the millimeters. Still, before you upload your file, you can choose between Millimeters, Centimeters, and Inches as units of measure for your 3D print.
Be careful, however, because if you designed your model in centimeters in your CAD software when you upload it on Sculpteo and choose millimeters, your object’s unit of measure would be changed.
For example, a cube of 10x10x10cm will become a 10x10x10mm cube. That’s why it’s imperative to choose the same unit on our platform as you did on your CAD software. If you forget to select the unit of measure before uploading your file, don’t worry! You can still do it afterward.
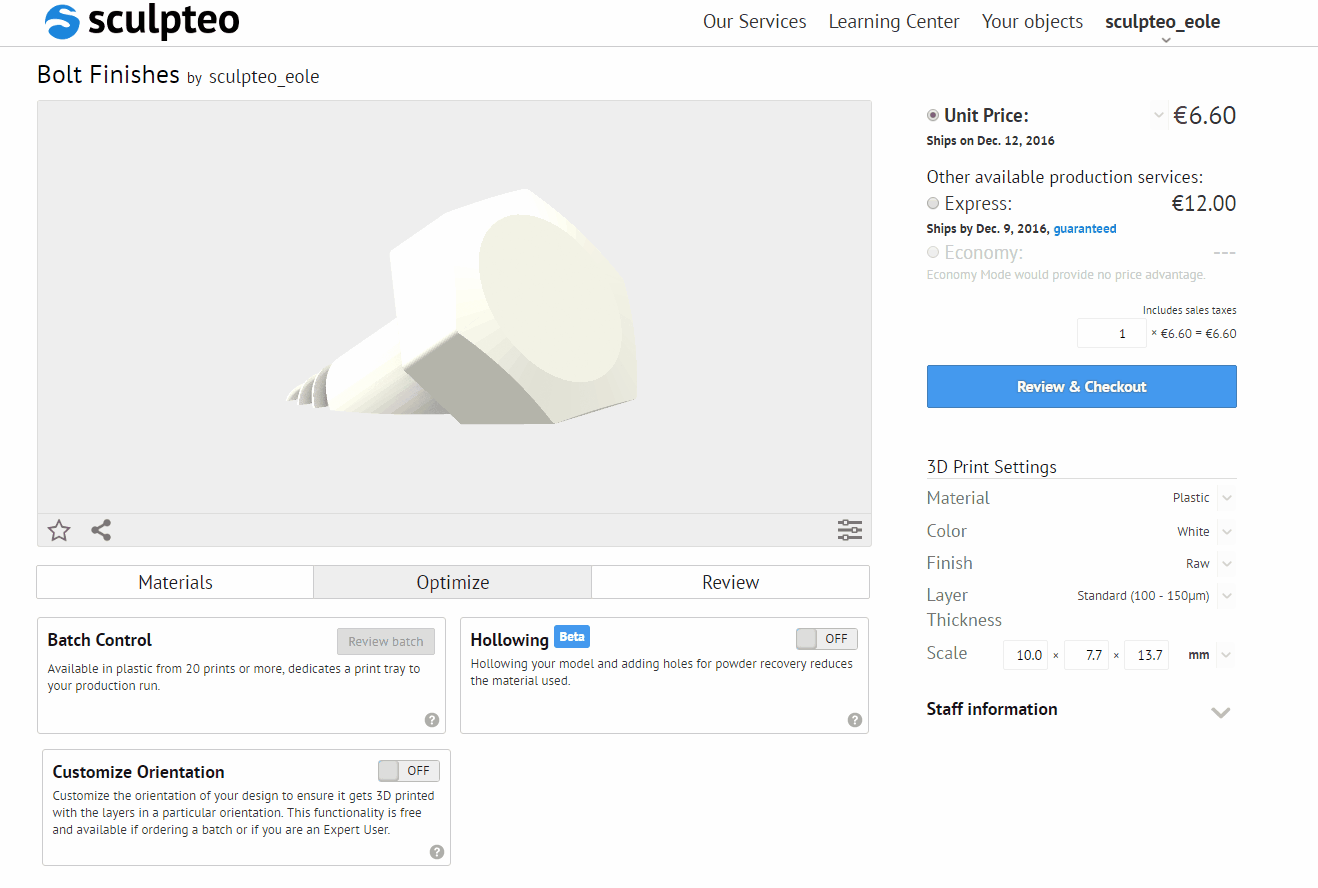
In the 3D printing settings tab, under Review and Checkout, you can see a recap of the options you chose before placing your order. If the measuring unit doesn’t match your CAD file settings, modify it. As you change the settings, the price will automatically adjust (as shown in the image below).
Dimension, Weight, and Size Constraints of a 3D printing
The 3D printing process observes some constraints depending on the material you choose and the associated 3D printer.
The printing surface is indicated on the material page of our Learning Center.
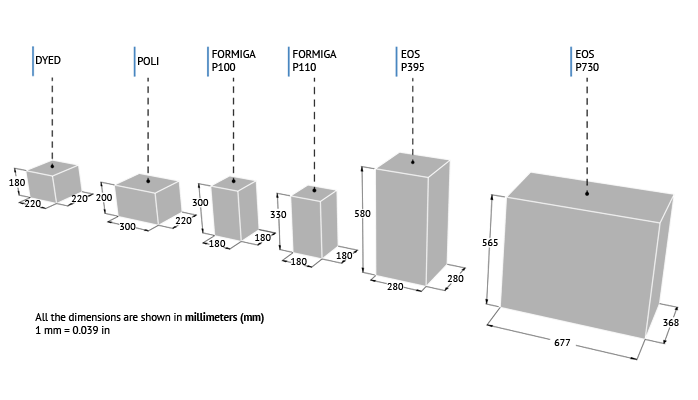
For example, 3D printing in white plastic polyamide (PA11) with a raw finish involves a maximum size of 677 x 368 x 565 mm.
Depending on your material, finish and needs, the size plays a significant role in the success of your 3D printing project.
To learn more about the material sizes of each material, you can visit our Learning Center.
The weight of your model also plays a role in the price and the size of your object. A more significant object involves more raw material, which leads to a more expensive and heavy object. You can hollow your model in your CAD software or directly on Sculpteo with our automatic Hollowing tool to counter this effect.
You just have to place two holes on your model to allow the unfused material to be evacuated, your model to become lighter, and your price reduced in real-time on the platform.
Modify the Size of Your 3D Printed Object
As you will transform a digital model (your CAD file) into a physical object (the 3D printed object), it is essential to control the size of what you designed. To modify the size of your object in your CAD software, you can see our tutorials on how to prepare your CAD file for 3D printing.
The method consists in using a measuring tool on each part to check if the object is of the correct size. Another technique is to create a cube you know the dimensions of outside of your model. When your object is inside the cube, you obtain the approximate area occupied by your object in the machine’s tray. We did a video to show you step by step how to control the size of your object in 3Dstudio Max. As you can see, this method is slow and specific. To simplify the process, we decided to provide a scaling tool directly on Sculpteo that allows you to modify the global scale of your object and see the impact on the price.
You just have to go into the 3D Printing Settings and modify the scale values to use that tool. The online tool scales the object proportionally on every axis to keep its proportions.
Be careful, however, not to oversize your object as it has to fit in the machine’s tray. A message will display if the object size exceeds the machine’s capacity.
On the contrary, do not reduce the scale of your object as the most delicate parts may not be 3D printed. Our online solidity check tool will verify if the thinnest parts could be printed or not and warn you about it. If parts of the model are too thin, our thickening tool could fix the issue directly online.